LOs:
LO1 - To learn how to manage sites and create a template in Adobe Dreamweaver
LO2 - To learn how to customise a template in Adobe Dreamweaver
Outcomes
Red - You will have setup a folder structure for your website
Amber - You will have created a suitable template and banner
Green - You will have created pages from your template
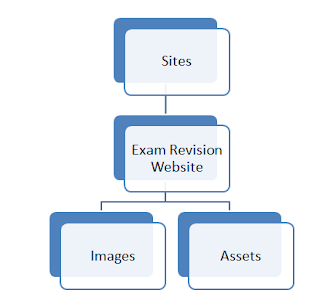
1. Set up this folder structure

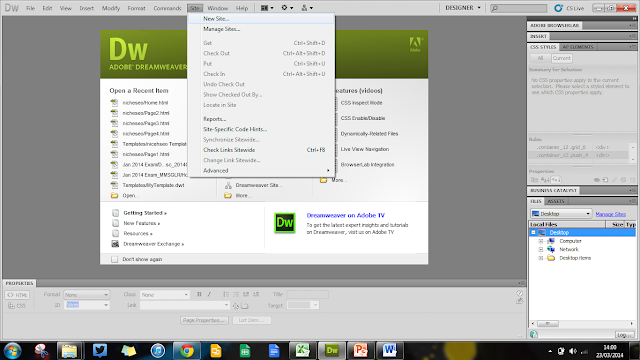
2. Manage your site to the Exam Revision Website Folder

Amber - You will have created a suitable template and banner
Green - You will have created pages from your template
Starter
1. Set up this folder structure

2. Manage your site to the Exam Revision Website Folder

Select the Exam Revision Website folder
Main
RED
Create Your Template
Use the worksheet to create a template for your Exam Revision Website
AMBER
Use the worksheet to create a template for your Exam Revision Website
AMBER
Create a Banner
Use Adobe Photoshop / Fireworks to create a banner for the top of your template
The banner should measure 1024 w x 200 h pixels
The banner should fit the full width of the page (you will need to change the rule for the container class to do this)
GREEN
Use Adobe Photoshop / Fireworks to create a banner for the top of your template
The banner should measure 1024 w x 200 h pixels
The banner should fit the full width of the page (you will need to change the rule for the container class to do this)
GREEN
Create Pages from Your Template
Create the following pages from your template
How to Make a Template
How to Insert an Image
How to Make a Rollover Image
How to Make a Link
How to Change the Screen Resolution
How to Embed a Video
Helpful Websites
EXT
Create the following pages from your template
How to Make a Template
How to Insert an Image
How to Make a Rollover Image
How to Make a Link
How to Change the Screen Resolution
How to Embed a Video
Helpful Websites
EXT
Start adding how to guides on to each of your pages
Make sure that each image is:
- Saved in your images folder
- Saved as a .png
- Is less than 500kb
Plenary
Complete the skills and confidence checklist


No comments:
Post a Comment